- context
- warning
- prepare yourself
- let’s understand what we will do
- creating a custom keylayout
- The mapping itself
- Testing
- When everything is ok
- Downloads
context
We learn from our mistakes.
A few weeks ago, I ordered a logitech tablet keyboard and receive a logitech tablet keyboard for ipad instead of a logitech tablet keyboard for android.
While testing it, i discovered that the keyboard received was an azerty keyboard (like i wanted to) but was recognized as a qwerty keyboard. Looking at it closely, I realized that the place of some keys on this keyboard was not matching the standard place for an azerty keyboard.
I had to remap the entire keyboard :(
warning
I managed to map correctly my keyboard but it works only with the hacker keyboard enabled. Which is annoying because when you activate a bluetooth keyboard, android automatically switch on the android legacy software keyboard.
This tutorial involve (optionnaly) a few sticker too, if you don’t mind a DIY look for you keyboard.
prepare yourself
In order to remap a keyboard you need to prepare a few things: * Download a keyboard scancode tester * Get some paper (wider than your keyboard) and a paper pencil * Get some sticker you can cut and write on it to replace mis-placed keys * Download the hacker keyboard * Get yourself a mean to access your android shell and edit files
I recommand you: * Terminal Emulator: 256 colors compatible and allow to open multiple terminals at once * Busybox to have a descent text editor (vi)
let’s understand what we will do
- each physical key owns a unique scan code
- to this scan code we will assign an android identifier: the key code
- then we will assign a behaviour to each of these key code (what to print when the key is press with crtl, shift…)
For each of theses three steps we will use:
1. the scan code tester and a paper blueprint
1. a file like the system/usr/keylayout/Generic.kl file. It associate a scan code to an android keycode
1. a file like the /system/usr/keychars/Generic.kcm file. It associate an android key code to a behaviour.
We will see the accepted values for theses two files later in the article.
A keylayout (kl) file example:
| ...
key 48 B
key 49 N
key 50 M
key 51 COMMA
key 52 PERIOD
key 53 SLASH
key 54 SHIFT_RIGHT
key 55 NUMPAD_MULTIPLY
key 56 ALT_LEFT
key 57 SPACE
...
|
A keychars (kcm) file example:
| ...
key 8 {
label, number: '8'
base: '8'
shift: '*'
ctrl, alt, meta: none
}
key 9 {
label, number: '9'
base: '9'
shift: '('
ctrl, alt, meta: none
}
key SPACE {
label: ' '
base: ' '
ctrl: none
alt, meta: fallback SEARCH
}
key ENTER {
label: '\n'
base: '\n'
ctrl, alt, meta: none
}
key TAB {
label: '\t'
base: '\t'
ctrl, alt, meta: none
}
...
|
With this two file examples you have the whole layout for the SPACE key.
Understood ? quite simple. The problem is there are plenty of keys on your keyboard and the scan codes are not really easy to memorise.
creating a custom keylayout
The paper blueprint
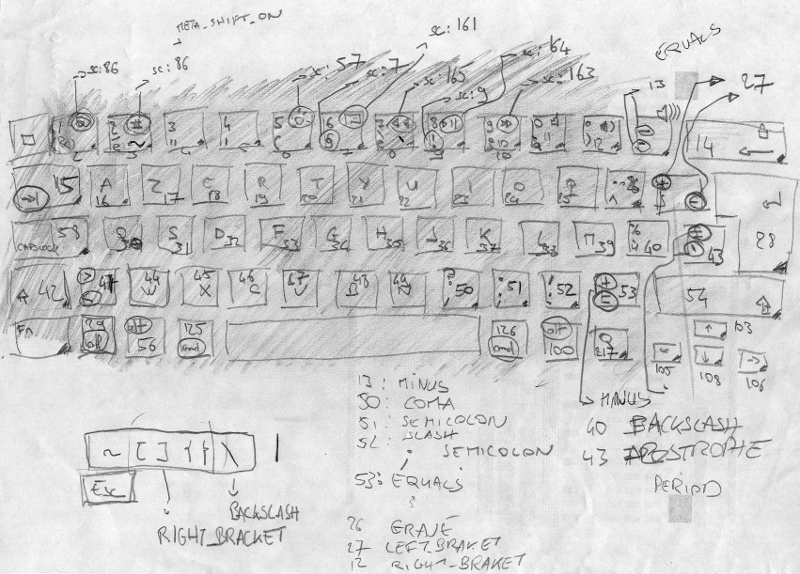
First, take your keyboard, the sheet of paper and your paper pencil. You will draw a blueprint of your keyboard that will make your life really easier for the rest of this tutorial.
When you have a “beautifull” drawing of your keyboard: 1. power on and associate your bluetooth keyboard to your android device 1. switch the input method on the hacker keyboard (on my device staying on the legacy android soft keyboard produced no scancodes) 1. open the keyboard scan code tester 1. for each physical key you want to change the behaviour, take note of the scan code on your paper blue print.
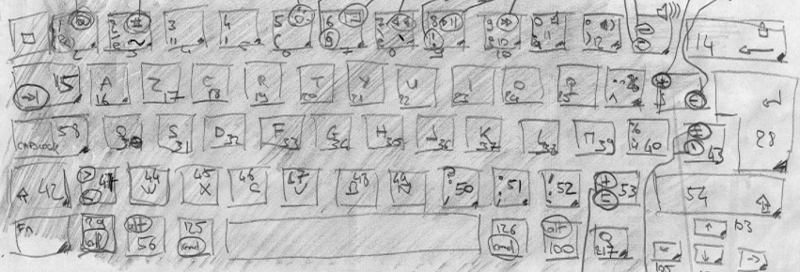
Now you have something like this:

The mapping itself
create the keychars and keylayout files
First, one word of advice: never ever edit Generic files, never!
Generic files are the last fallback when everything is broken, if you break them you have no fallback left.
We will need to create our custom files, for this we have to know specific information about your bluetooth keyboard.
For this log in to a terminal on your android device and type:
| cat /proc/bus/input/devices
|
you shoud see something like this:
| I: Bus=0005 Vendor=046d Product=b30a Version=011b
N: Name="Logitech Tablet Keyboard IPD"
P: Phys=18:46:17:E0:D6:FF
S: Sysfs=/devices/platform/tegra_uart.2/tty/ttyHS2/hci0/hci0:11/input8
|
Write down somewhere the Vendor and Product ids.
In my case: * Vendor id: 046d * Product id: b30a
Then, you absolutely need to be root to do this we have to mount the /system mount path to
enable read/write operations:
| su
cat /proc/mounts
# search for the system line (or grep 'system' /proc/mounts)
mount -o rw,remount -t ext4 /dev/block/platform/sdhci-tegra.3/by-num/p4 /system
|
Then we will copy the generic files to our custom ones:
| cd /system/usr/keylayout
cp Generic.kl Vendor_VVVV_Product_PPPP.kl
|
where VVVV is the Vendor id and PPPP the product id.
For exemple:
| cp Generic.kl Vendor_046d_Product_b30a.kl
|
Same thing for the keychars file:
| cd /system/usr/keychars
cp Generic.kcm Vendor_VVVV_Product_PPPP.kcm
|
Edit the keychars and keylayout files
Warning: If one of your file contains error the default android fallback is to switch to the Generic file. Which makes debugging very difficult. I strongly advise you to make simple change one key at a time, and test (see below) this change before switching to another key.
First, edit the keylayout .kl file. For every physical key you want to change, assign an android keycode to the physical key scancode.
Example: I assign my +/= key to the android EQUALS keycode.
| key 13 EQUALS
|
Here is the list of android keycodes. Just remove the KEYWORD_ before the constant names when using them in the kcm and kl files.
Here you’ll find the complete keyayout android doc
Warning: If you assign two scan codes to the same android keycode, the file will error.
Then, edit the keychars mapping file .kcm. The synthax is straight-forward:
| key EQUALS {
label, number: '='
base: '='
shift: '+'
ctrl, alt, meta: '}'
}
|
Example: Here I specify that the EQUALS keycode (previously assigned to the +/= key) should
print:
- = base, the default value
- + when shift is activated
- } when crtl or alt or meta is activated
- label,number: just a label, i put the base value here
Here you’ll find the complete keychars android doc
Then this is the unicode characters listing.
Testing
The only way i found to test this, is to:
- power off the bluetooth keyboard
- desactivate bluetooth on the device
- reactivate bluetooth on the device
- power on the bluetooth keyboard
- select the hacker keyboard because android force me to use the legacy soft keyboard on bluetooth connection
- Finally test my key in a text editor
Pffff, that’s long, repetitive and boring…
If you have an easier method, write me a comment ;)
When everything is ok
Don’t forget to remount your /system mount point in read-only
| mount -o ro,remount -t yaffs2 /dev/block/mtdblock3 /system
|
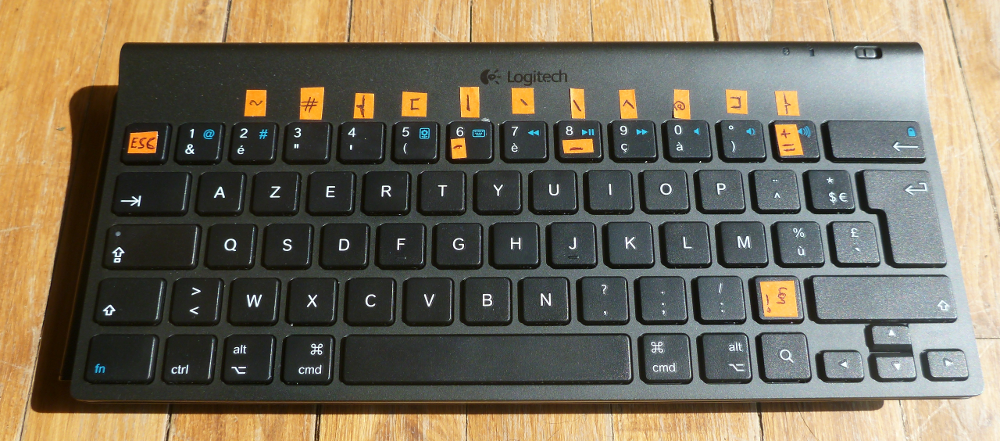
If you totally remap some keys, now your physical key has nothing more to do with the result it prints when pressed. It means that’s scissors and sticker time !
Look at my beautifull logitech bluetooth tablet keyboard for ipad on android:

Ok, now, you’re done ! I hope this article has been helpfull, let me know in the comments.
By the way:
Remember to save you keyboard layout and keycode mapping files somewhere. You don’t want to loose this hard work do you ?
If you want, you can send me your own bluetooth keyboard mapping files. I will publish them here in order to ‘centralize’ this mess that are keyboard layouts on android :)
Downloads
Here you will find links to the kcm and kl files for the logitech tablet keyboard for ipad:
